Building a Simple Bot
Note
This tutorial will show you the different parts needed to build a bot. Be aware that this is a small example to get started quickly, it doesn’t include a lot of training data, so there is some room for improvement of the final bot performance.
Here we show how to create your first bot the relevant classes in an application. This might be easier to follow if you also look at Plumbing - How it all fits together.
Goal
We will create a very simple bot that checks our current mood and tries to cheer us up if we are feeling sad. It will query our mood and based on our response will respond with a funny image or a message.
Let’s start by creating a project folder:
mkdir moodbot && cd moodbot
We need to create two data files (dialogue stories as well as nlu examples) as well as two configuration files (dialogue domain and nlu config). The final structure should look like this:
moodbot/
├── data/
│   ├── stories.md            # dialogue training data
│   └── nlu.md                # nlu training data
├── domain.yml                # dialogue configuration
└── nlu_model_config.json     # nlu configuration
Let’s go through each of them!
1. Define a Domain
The first thing we need is a Domain.
The domain defines the universe your bot lives in.
Here is an example domain for our moodbot, domain.yml:
1 2 3 4 5 6 7 8 9 10 11 12 13 14 15 16 17 18 19 20 21 22 23 24 25 26 27 28 29 30 31 32 33 34 35 36 | intents:
- greet
- goodbye
- mood_affirm
- mood_deny
- mood_great
- mood_unhappy
templates:
utter_greet:
- text: "Hey! How are you?"
buttons:
- title: "great"
payload: "great"
- title: "super sad"
payload: "super sad"
utter_cheer_up:
- text: "Here is something to cheer you up:"
image: "https://cdn77.eatliver.com/wp-content/uploads/2017/10/trump-frog.jpg"
utter_did_that_help:
- text: "Did that help you?"
utter_happy:
- text: "Great carry on!"
utter_goodbye:
- text: "Bye"
actions:
- utter_greet
- utter_cheer_up
- utter_did_that_help
- utter_happy
- utter_goodbye
|
So what do the different parts mean?
intents |
things you expect users to say. See Rasa NLU for details. |
entities |
pieces of info you want to extract from messages. See Rasa NLU for details. |
actions |
things your bot can do and say |
slots |
information to keep track of during a conversation (e.g. a users age) |
templates |
template strings for the things your bot can say |
In our simple example we don’t need slots, so that section doesn’t appear in our definition.
How does this fit together?
Rasa takes the intent, entities, and the internal state of the dialogue,
and selects one of the actions that should executed next.
If the action is just to say something to the user, Rasa will look for a matching
template in the domain (action name equals the utter template,
e.g. as for utter_greeting in the above example), fill in any variables,
and respond.
Note
There is one special action, ActionListen which means to stop taking further
actions until the user says something else.
For more actions which do more than just send a message, you can define them as
python classes and reference them in the domain by their module path. See
Defining Custom Actions for more information about custom actions.
2. Define an interpreter
An interpreter is responsible for parsing messages. It performs the Natural Language Understanding and transforms the message into structured output. For this example we are going to use Rasa NLU for this purpose.
Since we want to use Rasa NLU, we need to define the user messages our bot
should be able to handle in the
Rasa NLU training format. Let’s create
some intent examples in data/nlu.md:
1 2 3 4 5 6 7 8 9 10 11 12 13 14 15 16 17 18 19 20 21 22 23 24 25 26 27 28 29 30 31 32 33 34 35 36 37 38 39 40 41 42 43 | ## intent:greet
- hey
- hello
- hi
- hello there
- good morning
- good evening
- moin
## intent:goodbye
- bye
- goodbye
- have a nice day
- see you around
- bye bye
- see you later
## intent:mood_affirm
- yes
- indeed
- of course
- that sounds good
- correct
## intent:mood_deny
- no
- never
- I don't think so
- don't like that
- no way
## intent:mood_great
- wonderful
- I am feeling very good
- I am great
- I am amazing
- I am going to save the world
## intent:mood_unhappy
- my day was horrible
- I am sad
- I don't feel very well
- I am disappointed
|
Furthermore, we need a configuration file nlu_model_config.json for the
NLU model:
1 2 3 4 5 6 | {
"pipeline": "spacy_sklearn",
"path" : "./models",
"project": "nlu",
"data" : "./data/nlu.md"
}
|
We can now train a NLU model using our examples (make sure to install Rasa NLU first as well as spaCy).
Let’s run
python -m rasa_nlu.train -c nlu_model_config.json --fixed_model_name current
to train our NLU model. A new directory models/nlu/current should have been
created containing the NLU model.
Note
To gather more insights about the above configuration and Rasa NLU features head over to the Rasa NLU documentation.
3. Define stories
So far, we’ve got a NLU model, a domain defining the actions our bot can take, and inputs it should handle (intents & entities). We are still missing the central piece, stories to tell our bot what to do at which point in the dialogue. There are two different ways to create stories (and you can mix them):
- create the stories by hand, writing them directly in a file
- create stories using the interactive learning (see Interactive Learning).
For this example, we are going to create the stories by writing them directly
into stories.md. But be aware, although it is a bit faster to write
stories directly by hand instead of using interactive learning, special
care needs to be taken when using slots, as they need to be properly set in the
stories. But enough talking, let’s get to our stories:
1 2 3 4 5 6 7 8 9 10 11 12 13 14 15 16 17 18 19 20 21 22 23 24 25 26 27 | ## happy path <!-- name of the story - just for debugging -->
* _greet
- utter_greet
* _mood_great <!-- user utterance, in format _intent[entities] -->
- utter_happy
## sad path 1 <!-- this is already the start of the next story -->
* _greet
- utter_greet <!-- action of the bot to execute -->
* _mood_unhappy
- utter_cheer_up
- utter_did_that_help
* _mood_affirm
- utter_happy
## sad path 2
* _greet
- utter_greet
* _mood_unhappy
- utter_cheer_up
- utter_did_that_help
* _mood_deny
- utter_goodbye
## say goodbye
* _goodbye
- utter_goodbye
|
The bot actions are also events, and are specified by lines starting with a dash. The end of a story is denoted by a newline. See Stories - The Training Data for more information about the data format.
4. Put the pieces together
There are two things we still need to do: train the dialogue model and run it.
To train the dialogue model, run:
python -m rasa_core.train -s data/stories.md -d domain.yml -o models/dialogue --epochs 300
This will train the dialogue model for 300 epochs and store it
into models/dialogue. Now we can use that trained dialogue model
and the previously created NLU model to run our bot:
python -m rasa_core.run -d models/dialogue -u models/nlu/current
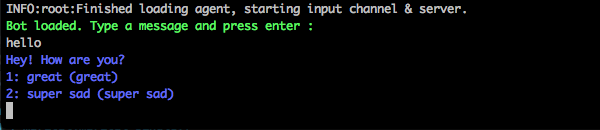
And there we have it! A minimal bot containing all the important pieces of Rasa Core.
Bonus: Handle messages from facebook
If you want to handle input from facebook instead of the command line, you can
specify that as part of the run command, after creating a credentials file
containing the information to connect to facebook. Let’s put that
into credentials.yml:
1 2 3 4 | verify: "rasa-bot"
secret: "3e34709d01ea89032asdebfe5a74518"
page-tokens:
1730621093913654: "EAAbHPa7H9rEBAAuFk4Q3gPKbDedQnx4djJJ1JmQ7CAqO4iJKrQcNT0wtD"
|
If you are new to facebook messenger bots, head over to Facebook Messenger Setup for an explanation of the different values.
After setting that up, we can now run the bot using
python -m rasa_core.run -d models/dialogue -u models/nlu/current \
   --port 5002 --connector facebook --credentials credentials.yml
and it will now handle messages users send to the facebook page!